Tuesday, October 29, 2013

Welcoming the Warmer Weather - Dirty Pirate Icy Poles


Growing up, one of the best things in summer is icy poles. Essentially, just frozen coloured sugar water, they were such an awesome treat. You would fight with your siblings to get the best colour/flavor even though they were essentially the same. In my house, usually the red went first and the green were left until last. Then you become a teenager, you move on to frozen coke and slushees. Essentially still frozen sugar water but so much cooler in a cup than eating it from a plastic tube.  Then you become an adult and you are supposed to be more grown up. But it’s still 40C + in summer and you still want to run around under the sprinklers (on your two allocated sprinkler nights), and you still want an icy treat.

The Dirty Pirate is so named for it’s two alcohols – Captain Morgan Dark Rum (Pirate) and Kahlua (the coffee makes it “Dirty” like a 'dirty chai'). Mixed with coke and frozen, it’s quite the fun little naughty treat. Incredibly easy, all you need is the icy pole molds. My ones I got from K-mart for $2 for the 4-tray. These measurements will make 12 of this size. I particularly like the cup/straw shape in the bottom of the handle, so you can drink up the drips as it melts. Being alcoholic, they can melt quite quickly.

It’s been a long wait for Spring to kick in over here in Perth (35C today!), so at the first sign of a warmer weekend, I made some of these to celebrate. I have a feeling they’ll make an appearance at a few BBQs over summer. You will have to remember though, that if you make these for a BBQ where kids are in attendance, that you better make a tray of non-alcoholic ones too! They will not be happy seeing adults eating icy poles when they can’t have one. Mark the trays, so they don’t end with yours!

This works best with flatter Coke, so if you open a new bottle/can to make it - stir it a bit to release some of the bubbles.


Dirty Pirate Icy Poles
2 3/4 cups flat Coke
1/3 cup Captain Morgan dark rum
1/3  cup Kahlua

Stir all together in a jug or bowl with a spout. Pour into icy pole molds and freeze!


Tuesday, October 22, 2013

How the Focaccia - Lemon and Olive Wholemeal Focaccia


You know how sometimes you get given an appliance and it sits there? Or sometimes you even buy yourself an appliance and it just sits there. Well, I’ve got a few of those in cupboards around the house. And I feel bad, because I know they are probably really useful. But when you don’t have a great deal of time to cook already, it can be just too difficult to get out a new appliance and learn how to use it. Or even think about it sitting there. It may even be revolutionary in it’s time-saving-ness and it’s something you should be using every day…but it’s in the box and you need to read the instructions and. And. And…you don’t use it. And it sits there. You need a kick to get it out and use it.

One of those said appliances for me is a breadmaker. Stupidly, I grew up with a breadmaker, mum stopped buying bread and made it all when I was in high school, but I still didn’t rush to use my own. We don’t eat a great deal of bread in our house, so it just didn’t make sense to make my own. I already have to freeze a loaf and thaw/toast it as I need it. But then l I fell in love with pretzel rolls. Beautiful, fluffy pretzel rolls. Not having a proper standmixer yet, I had to work out another way of mixing the dough. And then it hit me. The breadmaker. Well, that folks, was the revelation I needed to start using my breadmaker.

Lance and I host an annual day-long BBQ for friends and family in October and being a full-day of drinking and celebrating – we need decent filling snacks to keep things from getting too rowdy. Bread is perfect for that.  This recipe makes a foccacia the size of a whole baking tray, so it's perfect for entertaining a large group of people.

I served this with maple butter. A little trick I learnt on the Sweet Escape Retreat. Drizzle a little maple syrup into room temperature butter and mix in well. Delicious.


Lemon and Olive Wholemeal Focaccia
2 cups warm water
1 tbsp yeast
3 tbsp sugar
2 ½ cups plain flour
2 ½ cups wholemeal flour
1/2 tsp ground cinnamon
1/2 tsp ground ginger
1 tbsp salt
1/2 cup olive oil
zest from one lemon

2 sprigs thyme, leaves picked off
20 or so pitted olives, sliced into rings
Coarse sea salt
2 tsp raw sugar
Drizzle of olive oil


In the base of your bread maker, stir the warm water, sugar and yeast together. Let it sit until foamy. Add the olive oil, then the flours, cinnamon, ginger and salt. Select the ‘dough’ setting and leave it to do it’s thing. Once finished, it should be a risen slightly sticky dough.


(If you don’t have a bread maker, follow the steps above but mix in a standmixer. Then put the dough in a large oiled bowl , cover, and place bowl somewhere warm for an hour or so to double in size.)

Preheat the oven to 200C. Line a baking tray with paper and dump the dough out into the middle . Stretch the dough out until it covers the whole baking tray. Poke bumps and holes into the dough. Leave it to rise in a warm area.

Drizzle a little olive oil over the top and gently rub it across. You should only need a few tablespoons. Then poke the olives into the dough a little, so it ‘holds’ them. Sprinkle with the lemon zest, thyme, salt and sugar.

Bake until golden and slightly crispy at the edges. Serve with maple butter.


Monday, October 14, 2013

Overcoming Kitchen Fears - Crispy Roast Duck with Orange, Honey and Mustard Glaze


I love duck. The crispy skin, the moist flavorsome meat that stands up to stronger flavours than chicken. If I see duck on a menu, I will invariably order it. In fact, my husband recently went out to dinner and came home and told me he had to take me there because it had my ideal dish. We went, less than a week later because he was so excited for me to have it and he couldn’t have been more right. It was roast duck breast, with ginger and pumpkin puree on scallops and beetroot salad. You couldn’t get a more perfect combination of my current favourite foods in the one dish! Especially the duck and scallops. Love!

When I saw that a supermarket had whole ducks on special, I knew that it was time to try cooking it. Now, as much as I love duck, I’ve also been served a fair few bad duck dishes. It seems that duck is really easy to over-cook. And so I left my whole duck in the freezer for a while before I got the courage to actually try it. I read the cooking instructions on the back of the packet and then a few more recipes from the duck supplier’s website, and it all seemed pretty straight-forward. And from this, and the process of cooking it I learnt a few important things about 
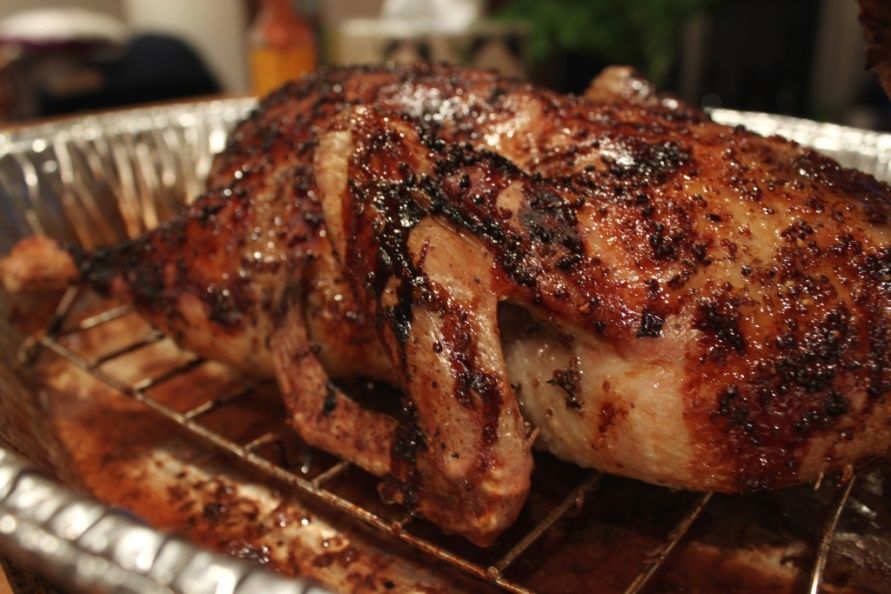
cooking duck that are important. Number 1. Duck has a lot of fat just below the skin. You want most of this to render out – both to make the finished meat less fatty and to help the skin get crispy, not soggy. The best way to do this is to pierce the skin, so it can come out as it roasts. Number 2. This fat can smoke/spatter/be just plain dangerous. The best way to deal with this is to add liquid to the roasting tray, and put the duck in a rack up out of it. Apart from that, roasting the duck is pretty much the same as roasting a chicken. So don’t be scared! The added bonus of roasting a duck this way is that it creates an awesome duck stock and duck fat. Just pour the fat/pan juices into a container and put it in the fridge. It’ll separate into duck jelly below, duck fat on top. To make stock out of the jelly just add hot water.

I saw a catalogue which had the cookbook associated with Jamie Oliver’s new show teaching you how to use leftovers to maximize the 
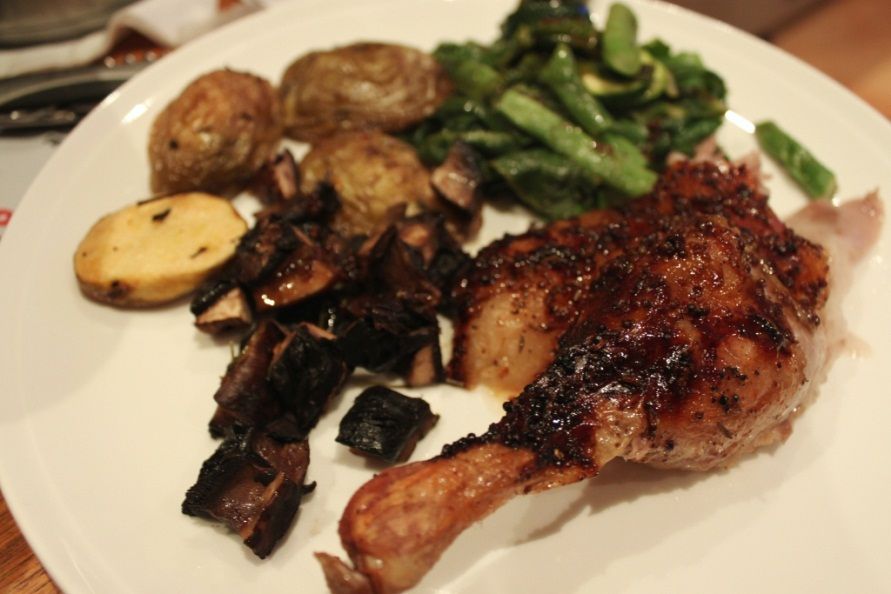
cost savings of using up everything you buy. This roast duck was a good example 
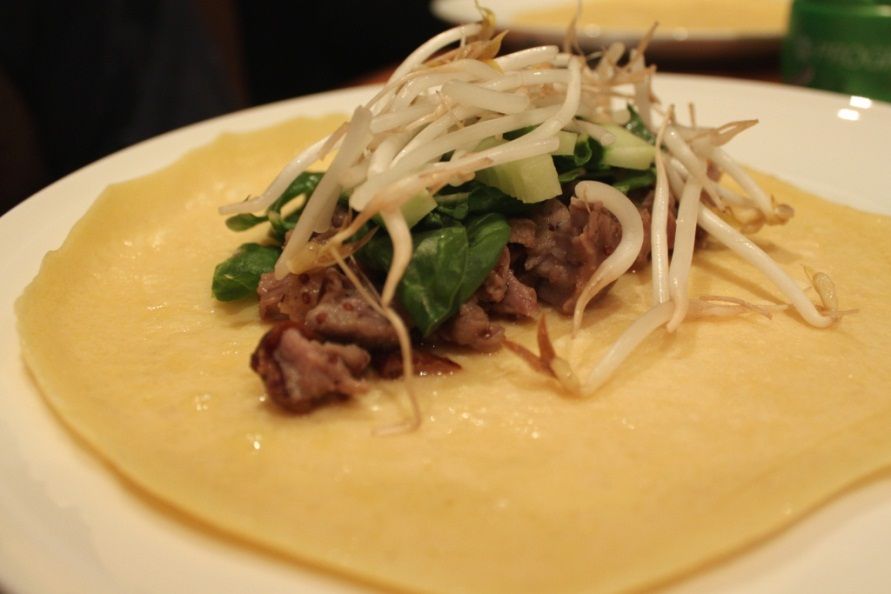
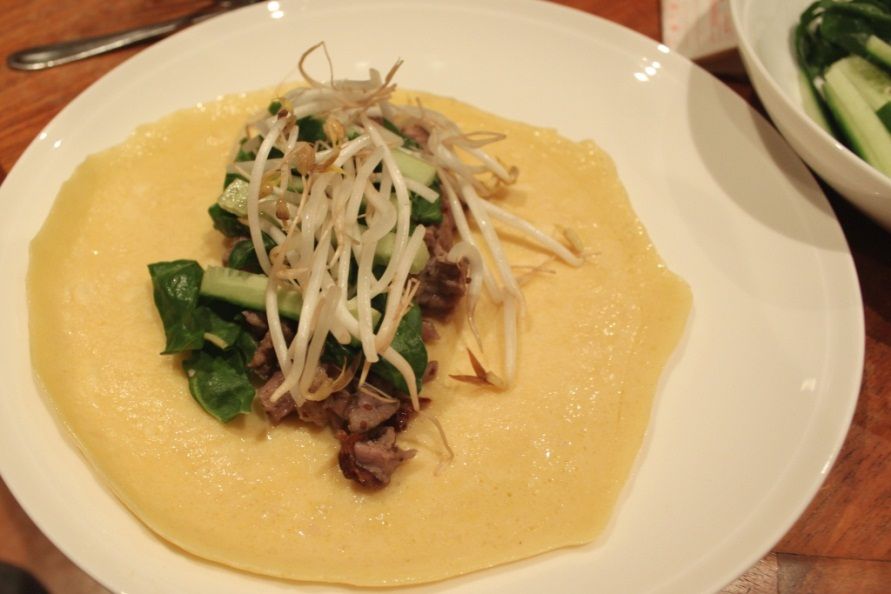
of how to do this. Served as a roast the first night, I then shredded the leftover meat and heated it up in the leftover glaze/sauce and served it with pancakes the next night. The following night I used the stock to make a buckwheat risotto, and the duck fat is in my fridge for making duck fat roast potatoes.


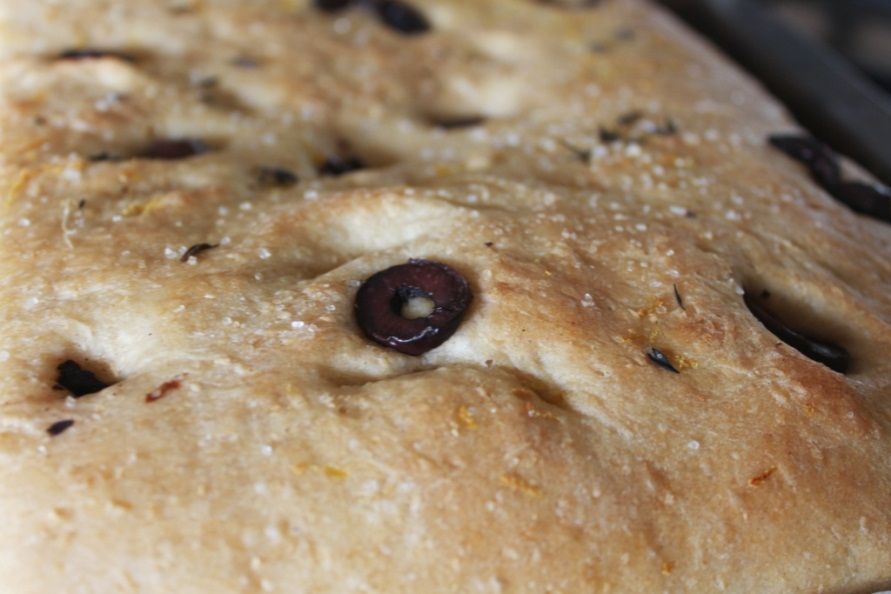
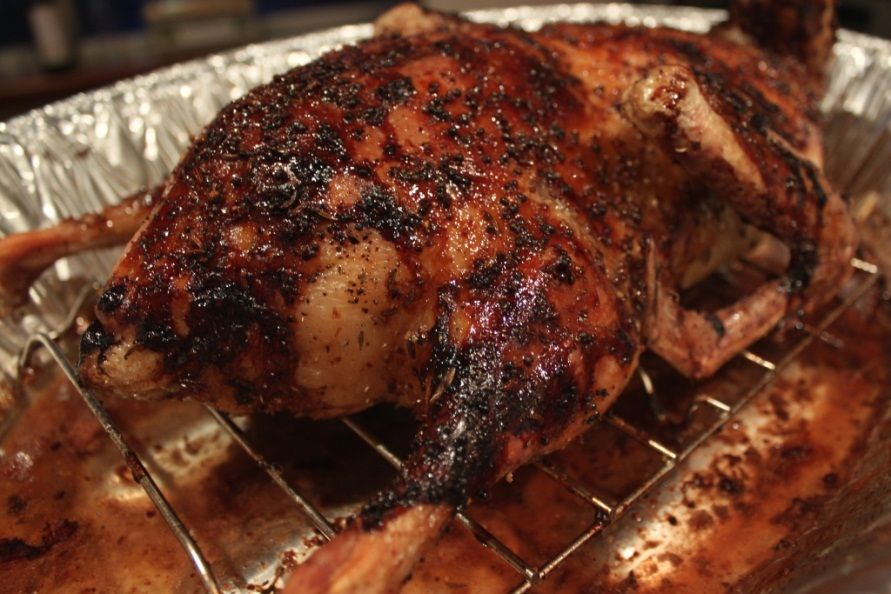
Crispy Roast Duck with Orange and Mustard Glaze
1 duck
1 cup red wine
1 cup water
4 cloves garlic, peeled and slightly crushed

Rub
1 tsp sumac
½ tsp caraway seeds
Generous amount of salt
1 tsp black pepper
4 sprigs thyme

Glaze
2 teaspoons seeded mustard
4 tsp honey
¼ cup orange juice
1 teaspoons caraway seeds
1 tsp sumac
½ tsp salt

Prick the duck all over. Try not to prick it through the meat, you just want to open up the skin so the fat underneath can render out.

Pour a kettle of boiling water over the duck to tighten up the skin. Pat the duck as dry as possible using paper towels, then put it on a rack and stick it in the fridge for at least 1 hour.
 
Preheat the oven to 175 degrees C. Pat the duck dry again with paper towels. Rub a few tablespoons of salt on the inside and outside of the bird. Mix the rub ingredients together, and rub all over the duck and a little inside the cavity. Fill the cavity with the remainder of the thyme sprigs and the garlic cloves.

Pour 1 cup of water and 1 cup wine in the bottom of a roasting pan with a wire rack and place the duck on the rack, breast-side up. You want the duck high in the pan so it doesn’t sit in the fat that renders out of it. Roast for about an hour. After an hour, when the bird has about 30 minutes left to go, make the glaze.

Add all of the ingredients to a small pot and simmer until reduced down to a sticky sauce. Baste the duck with the sauce, then return to the oven. Roast for a further 15 minutes, then baste again. After the remaining 15 minutes it should be ready, but prick the bird in  a thick part meat and if the juices run clear, it’s cooked through. Serve immediately so the skin stays crispy.


Tuesday, October 8, 2013

Spring Salads - Quinoa salad with Tamarind Dressing

The days are (occasionally) getting warmer and brighter and the need for raw veges is slowly creeping in. My body craves crunchy, fresh produce and as I unpack my box of groceries, I can't help but pick at bits. A broccoli floret might have 'accidentally' ripped off into my mouth. A snow pea 'fell-out' of the bag on to the counter so I might as well eat it. Then Lance points out that it's lunch time.

There's some cooked quinoa in the fridge (ready for these biscuits), a few slices of chilli pancetta and a tiny bit of sheep milk fetta leftover in the fridge. Add some fresh vegetables, some parsley and mint from the garden and the tamarind dressing I'm currently in love with and you have the perfect weekend lunch. Make enough for lunch the next day, too. All of the vegetables are interchangeable for what you have or what you like. My aim was for pretty colours and a range of textures.

Spring Salads - Quinoa salad with Tamarind Dressing


Quinoa Salad with Tamarind Dressing

(serves 3-4)
1 cup cooked quinoa
1 small carrot
4 large cauliflower florets
½ capsicum
1 tomato
1 dill pickle
2 kale leaves, inner rib removed and shredded
3 slices pancetta
Sheep fetta
1 tbsp toasted pepitas
1 tbsp toasted pine nuts
½ tbsp. cacao nibs
¼ cup shredded flat leaf parsley
¼ cup shredded mint
3 tbsps Tamarind dressing (recipe here)


Chop all the vegetables into similar size pieces, I went for a very small dice. Slice the dill pickle smaller still. Shred the pancetta into small pieces.
 
Toss all ingredients together, apart from the fetta and dressing. Slowly add the dressing, using just enough to coat, rather than drown it. Crumble fetta over the top and serve!
 Spring Salads - Quinoa salad with Tamarind Dressing
Spring Salads - Quinoa salad with Tamarind Dressing

Thursday, October 3, 2013

Recreating Deliciousness - Coppelia Calamari with Tamarind Dressing

On my recent holiday, I ate a lot of Cuban. A lot. It started at Bar Pulpo at the Melbourne Airport. And it was good. So rare to get good food at an airport! But I was really impressed. It made the 5 hour plane delay bearable! Then in the states, I went to a restaurant in New York that was recommended to me - Coppelia. And even though it's been two or so months since I've been there, I still consider it one of my favourite restaurants. It's a funky Latin diner style restaurant with ridiculously good, well-priced food. We went to another 4 Cuban restaurants in our trip and loved every single dish. So I came back and wishlisted a few Cuban cooking books on bookdepository (but if you have any recommendations for other good Latin and Cuban cookbooks to add to the list, I'd love to hear). So you can look forward to Skamp's versions of other Latin dishes!
 
Lance and I both fell in love with Coppelia's blue cornmeal crusted calamari with tamarind vinaigrette. We are haunted by it, so I am trying to create an "at-home" version. We don't get plantains in WA (or if you know of a place they're available, please, please, please let me know!!!) so I substituted bananas. Here's a photo of their version:


I couldn't find blue cornmeal, but I already had some blue corn flour (blue masa), which I used for the flour for the dusting as well as in the coating cornmeal. I get mine from one of my favourite shops in Perth - Kakulas. Using masa for the whole dish makes it naturally gluten free, if that's an issue for you.
 
To make the tamarind dressing, firstly you have to make tamarind syrup. There's a recipe here on my Kale Tamarind Salad recipe. You'll see in the pictures of my version, that it wasn't nearly saucy enough compared to theirs. When I heated the sauce, it reduced right down, so this recipe is double.


My verdict on it's similarity? Well, it's not quite the same, but it's still delicious. But my memory might also be failing me. I think the best thing to do would be to go back to New York to re-acquaint myself with the original!
 
 
Calamari
200g squid rings
1 cup rice bran oil for frying
2 firm but ripe bananas, cut into 3cm chunks

Flour mix
1/4 cup blue corn flour
1/2 tsp salt
1/2 tsp pepper

2 beaten eggs

Cornmeal mix
1/4 cup blue corn flour
1/4 cup cornmeal
1/2 tsp ancho chilli powder
1/2 tsp chipotle chilli powder

Tamarind Dressing
16 tbsp tamarind syrup
8 tbsp red wine vinegar
4 tbsp olive oil
4 tbsp cachaca
salt & pepper to taste

Have the flour mix, egg wash and cornmeal mix in three separate bowls, ready to go. Then an empty plate for the coated ring.

Dip each calamari ring in flour mix, shake to remove excess. Then the egg wash, shake to remove excess. Lastly coat with the cornmeal mix. Then coat the banana pieces in the same way.

Heat the rice bran oil in a wok or frypan - enough to create a shallow layer. Carefully splash a drop of water into the hot oil. If it sizzles, it's hot enough. Without crowding the pan, fry the calamari rings a few at a time, allowing to crispen and darken before turning over. It'll take a few minutes per side.

Place on paper towel lined plate and keep warm. Repeat with all rings until they're all cooked, then do the banana pieces, cooking each side until crispy.

In a separate pan, add all of the dressing ingredients and heat the pan to medium. Stir as it cooks for a minute or two until it reduces into a sticky sauce. carefully put the calamari and bananas in the sauce and stir to coat. Plate up, the drizzle the remaining sauce over the top.

Served here with a bean sprout, coriander, ginger and peanut salad.