Showing posts with label entertaining. Show all posts

Tuesday, December 30, 2014

Summer BBQ - Pumpkin and Miso Slaw

Summer BBQ - Pumpkin and Miso Slaw

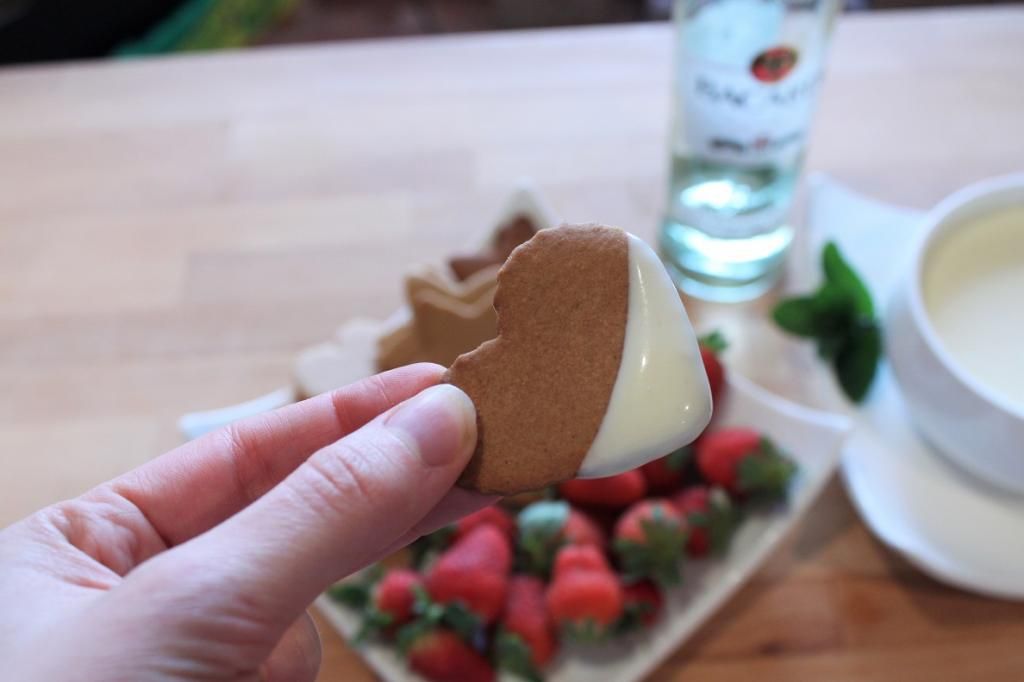
I am lucky enough to have just over a week off for my company's Christmas shut-down and I had grand plans to make up for the current decline in my blog posts and prep a whole bunch for the new year. Then I would catch up on reading other blogs and spring clean my desk area and re-arrange the spare room and do some gardening. And. And. And I have done none of it. Today is the first day I've even been willing to turn my computer on. This has been officially my laziest Christmas break. I've actually used it as a break! Lots of book reading and beach going and lazy shopping.

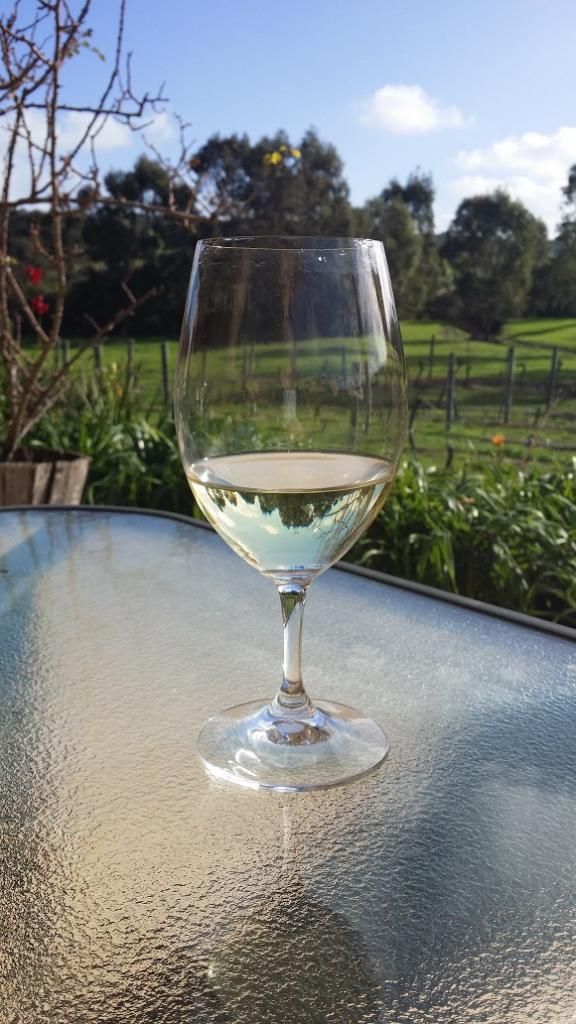
Hopefully everyone has had a fabulous holiday period. I certainly did, celebrating with both families, eating up a storm. In lieu of a big night tonight (with Lance not getting January 1st off), we also had our now traditional New Year's Eve Eve Eve Eve Eve BBQ. But tonight we will have a quiet BBQ at home with the best of intentions to stay awake until midnight. And we will be eating this salad. 

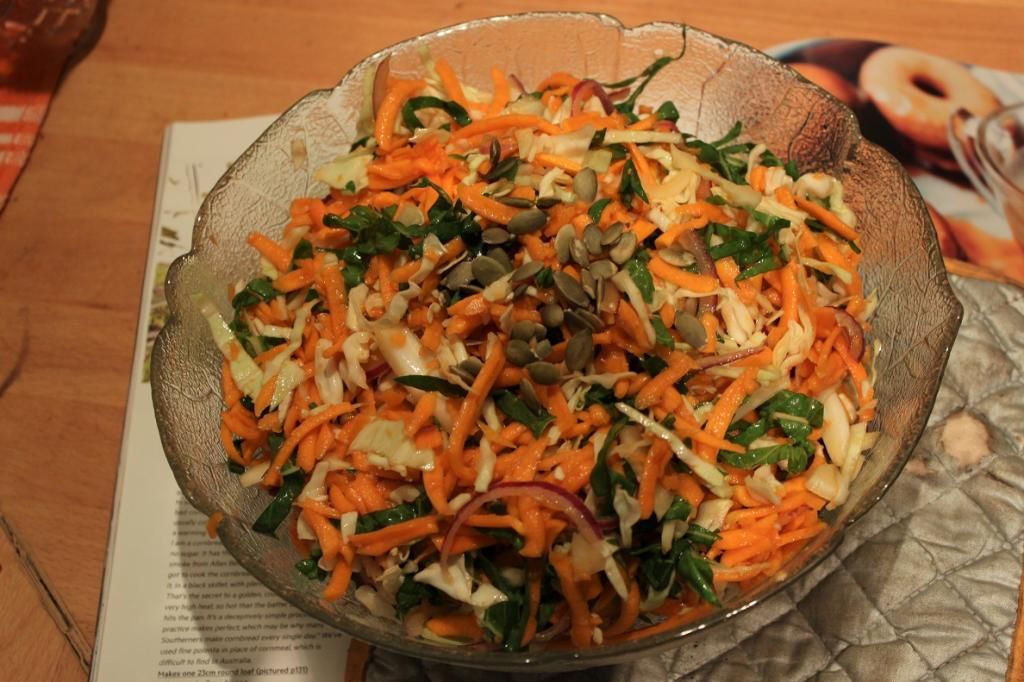
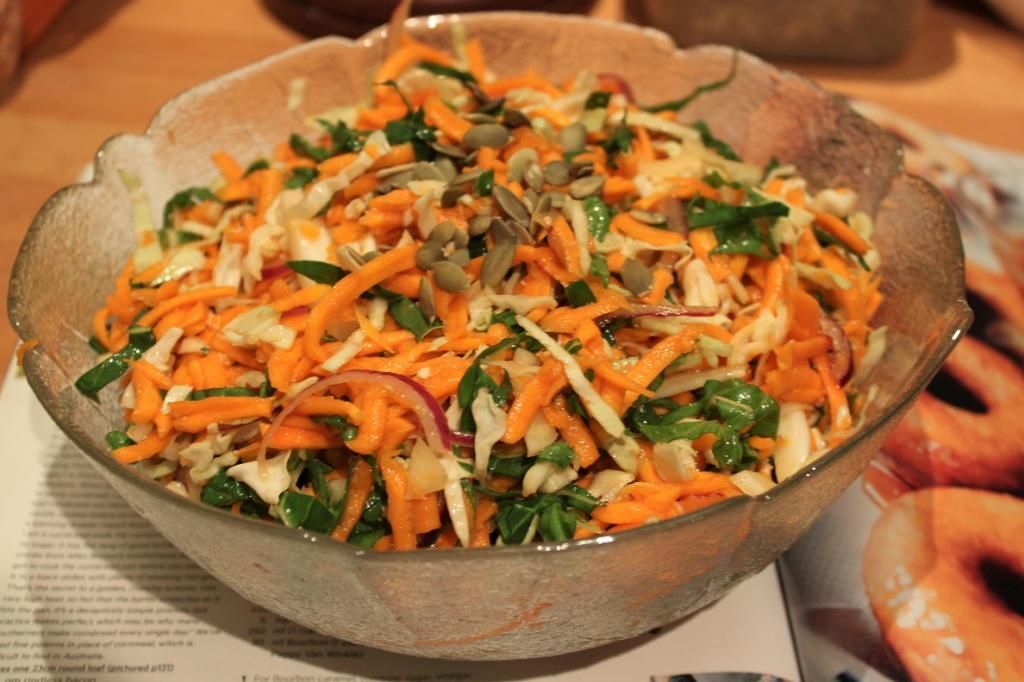
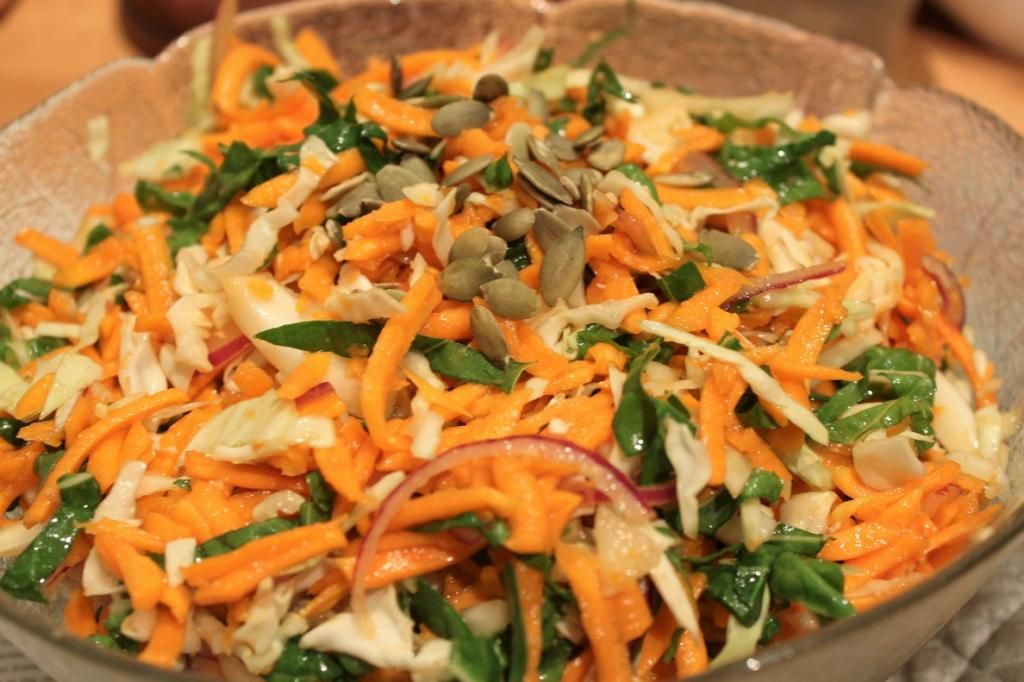
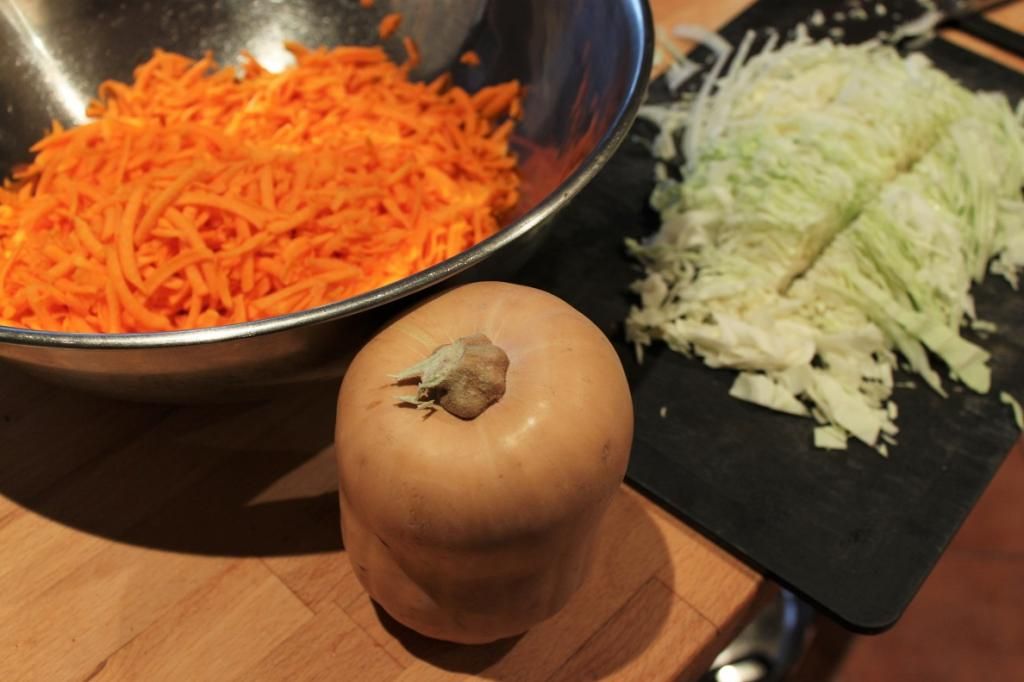
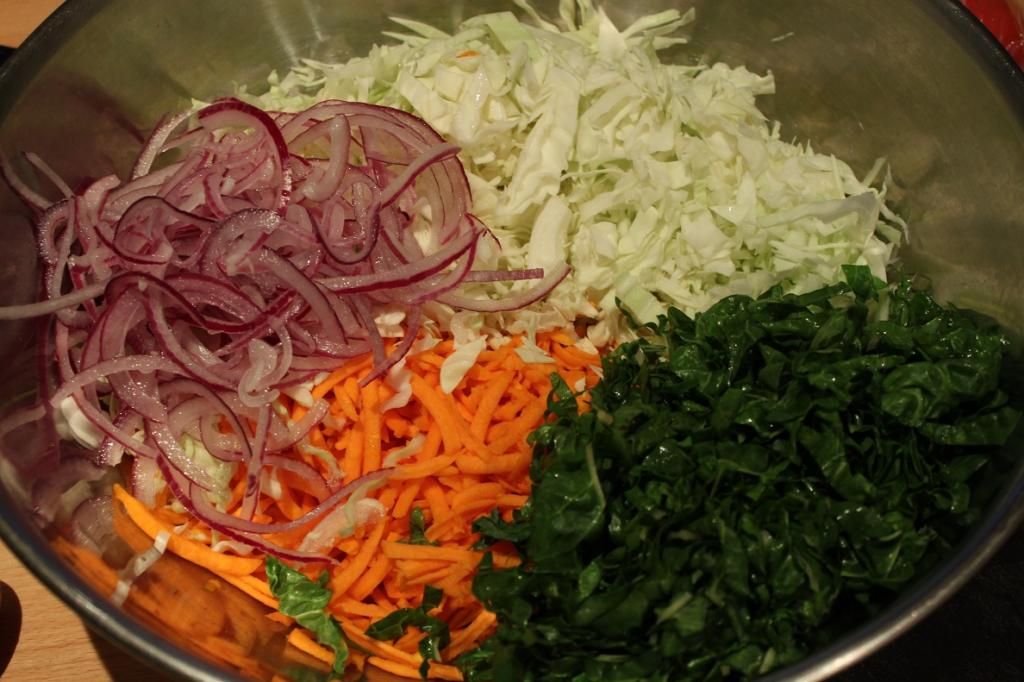
This is currently one of my favourite salads. It is super easy to make, and can be made a day or two in advance if necessary. It is the perfect salad to take to a BBQ. It is a vinegar-based slaw, rather than the mayonnaise based coleslaw that most Australian's are more familiar with, which makes it a much lighter dish. Instead of carrot, I use pumpkin with red onion and silverbeet (chard) for colour. The salt comes from the delightfully savoury taste of miso paste, whilst maple adds a sweet touch against the vinegar. A touch of sriracha adds a faint spice, without too much heat. Toasted pumpkin seeds round out the texture perfectly.

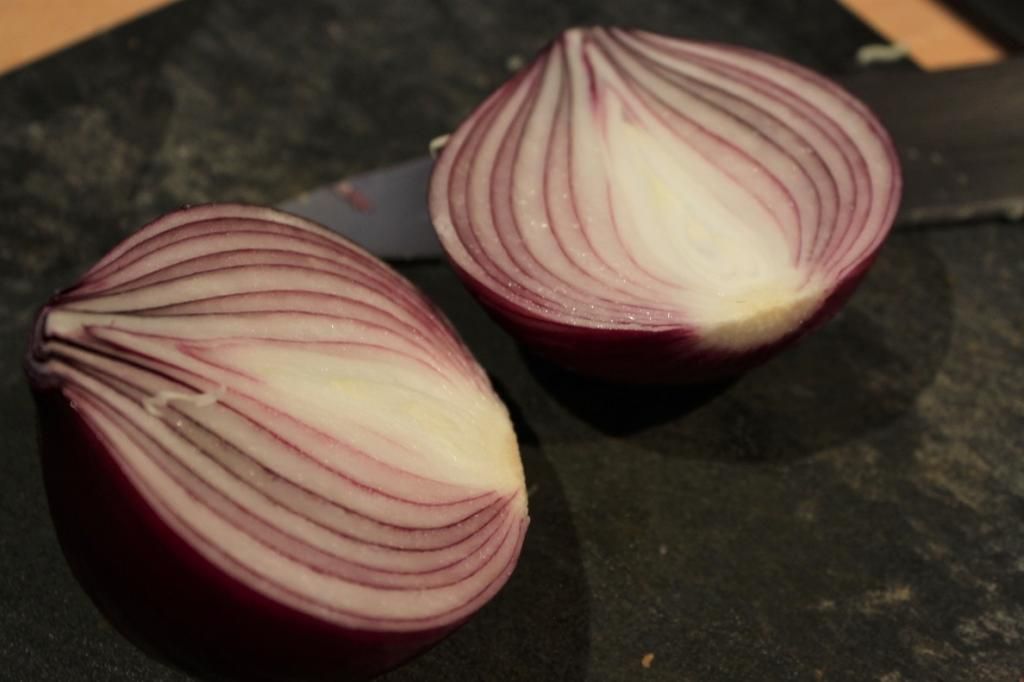
I am not the hugest fan of raw onion in salads, which is why I added the step to sit the onion in vinegar first. It takes a little of the onion's punch out. Feel free to skip this step if you are an onion lover.

This makes a large amount of salad, but as I said, it keeps a few days in the fridge so you can have it as leftovers if you aren't serving it to a crowd.

Happy New Year my lovely readers, and I promise my posts will get a little more on-track in 2015!


Summer BBQ - Pumpkin and Miso Slaw


Pumpkin Miso Slaw

1 small butternut pumpkin
¼ head cabbage
3 leaves silverbeet
¼ cup toasted pepitas
½ white onion
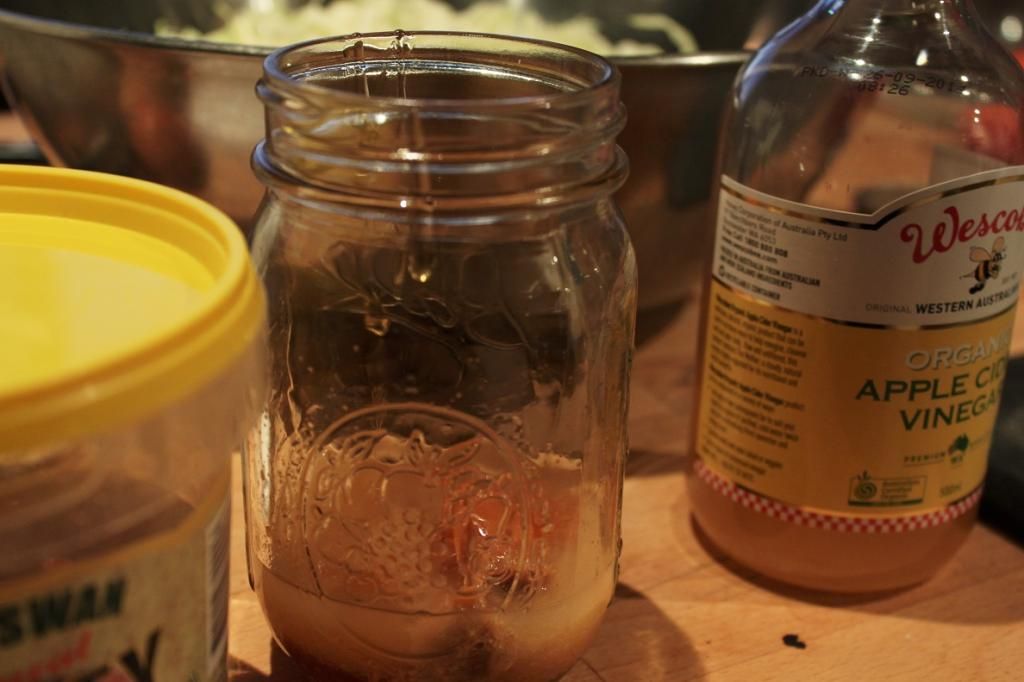
1/4 cup + 2 tbsp apple cider vinegar, divided
2 tbsp miso paste
2 tbsp maple syrup
1 tbsp olive oil
3 tsp sriracha (or to taste)
Salt & pepper to taste


Thinly slice the onion into half moons, cover with the 2 tbsp apple cider vinegar and set aside whilst you prepare everything else.


Grate (by hand, or in a food processor) the pumpkin, finely shred the cabbage and silverbeet. Mix together in a large bowl.


Add all the dressing ingredients to a jar and shake until well combined. Taste for seasoning, adjust as required. Pour over the salad and mix well to coat everything. Mix the onion into the salad. Set aside for half an hour for the acid in the vinegar to soften the pumpkin.


Just before serving, toss through the pumpkin seeds


Summer BBQ - Pumpkin and Miso Slaw

Saturday, November 8, 2014

Sparkling Meals - Prawn and Squash Spaghetti with Champagne Sauce

Sparkling Meals - Prawn and Squash Spaghetti with Champagne Sauce

Sometimes, you have multiple things to celebrate in a short space of time. Like having an award winning Chocolate Beer Jam. Or having it confirm that your recipe will be included in a cookbook. Or having a birthday. And all of those things individually might require a toast…but together, they definitely do. And sometimes, you somehow are left with a half bottle of bubbles when such an occasion arises. I am a little funny about drinking bubbles after the day I open them. Even though we have an incredible re-corking stopper, it’s just something I don’t enjoy as much after the fact. And so I was left with a little champagne (in reality, sparkling wine, but I’m gonna be fancy and call it champagne) that I couldn’t bear to waste. Well, cooking with it seems like the best use!

I’d seen (and eaten) quite a few champagne cupcakes in the last few months. Seems like quite the trend in Perth at the moment! But I wanted dinner, not cupcakes!

My next thought went to my gin and crab pasta, and then to the good deal of seafood pastas with vodka sauces over the years and thought that a seafood pasta sauce was definitely the go. But, I wanted the flavour of the champagne to shine through. It’s not as strong a flavour as the gin, so I didn’t want a thick creamy sauce, so I went with a buttery base. I added some delicious Shark Bay Prawns, and some finely sliced yellow squash for a mellow, summery addition. All complimentary, but subtle flavours. And here’s the kicker. Vanilla. Adding a vanilla bean to the reducing champagne takes this from tasty to next level delicious. It adds a sweetness that you can’t quite put your finger on, but you’d immediately notice it’s absence. Trust me on this. Then you’ll probably want to open another bottle of bubbles to drink with the dish. And you might end up with a little leftover…

This is a very simple dish with very few ingredients, so it pays for them to be good quality. I recommend using fresh spaghetti if you can, and although my champagne was day old, it was still good champagne. You can use anything you would ordinarily drink. It doesn’t have to be expensive, but given the scope of sweetness and dryness you get in sparklings, make it something you enjoy drinking.

Oh, and the last note I will add is that this dish comes together really quickly once you start cooking. I’d say it’s maybe a 15 minute meal. So prep all your ingredients first, get your pasta water boiling (especially if you have dried pasta) and then begin cooking. I used salted butter as that’s what I had, so I needed less salt than you will if you use unsalted.

Sparkling Meals - Prawn and Squash Spaghetti with Champagne Sauce


Prawn and Squash Spaghetti with Champagne Sauce 

1 ½ cups champagne (sparkling wine)
2 shallots, finely diced
3 small cloves garlic, minced
1 vanilla bean
125g butter, cubed.
Salt and pepper
500g fresh pasta
250g peeled prawns
4 yellow squash, very finely sliced
Chopped parsley to serve
Red chilli flakes (optional)
More champagne to drink with it!

Bring a large pot of salted water to the boil.

In a large sautee pan, pour in the champagne, shallots and garlic and a little pepper. Split the vanilla bean and scrape the seeds into the pan, then throw the pod in too. Bring to the boil over a medium heat and keep it simmering until it’s reduced by half. Add the butter, a few cubes at a time, and whisk well after each addition to blend into the sauce. Stir well for a further 1-2 minutes to thicken the sauce, then discard the vanilla pod and add the squash slices and prawns. Check for seasoning.

Put the fresh pasta into the boiling water.

Stir the prawns and squash into the sauce well, coating in the sauce and allowing to cook through. 2-3 minutes. At this point, your pasta should also be cooked, using tongs, pull the spaghetti into the sauce, allowing some (not too much) cooking water to come with it. Stir well to coat all the noodles in the sauce and blend the cooking liquid in.

Serve with some chopped parsley and some chilli flakes, if you’d like


Sparkling Meals - Prawn and Squash Spaghetti with Champagne Sauce

Tuesday, November 4, 2014

Macadamia Salted Caramel Tarts


Macadamia Salted Caramel Tarts
My mother in law has a crazy prolific macadamia tree. It’s so awesome. She gave it a huge haircut a few months back, and just from the branches she cut off, Lance and I salvaged a whole ice cream container of macadamia nuts. I’ve got a few macadamia recipes coming up over the next few weeks as I’ve tried to create some dishes that do these delicious, buttery nuts some justice. In the meantime, we’ve just planted a baby macadamia tree in our yard. I can’t wait til we start getting our own. On a side note, our mango tree has just started flowering. I was concerned because the first mango flower photos were being posted on Instagram by other Perth folk almost two months ago! I was worried that after our haul of 50 mangoes last year, this year our tree was going to give up on us!


Now to today’s recipe. This recipe can be made as a big pie, but mini desserts are always more fun, yeah? I like making small desserts for gatherings, rather than a big cake. Little things you can pick up and eat with your fingers. No knives and plates and whatnot. And often I’ll make a few things so you can sample all the desserts without feeling both ridiculously full, and having to do that awkward ‘just a *teeny* piece please’ thing…with accompanying hand gestures to indicate how teeny you want it. I have made these gorgeous little tarts a few times now and they never fail to impress. They are so moreish. The perfect mix of salty and sweet. And the macadamias add such a decadent richness to the whole situation.


 The base itself can be made just as biscuits, or like this, pressed into a pie shell. It’s a really simple food processor dough made using pretzels and macadamias. Not overly sweet, but delicious nonetheless. The filling is an adaption of a recipe I was given to test for the Recipes and Ramblings Cookbook – and it’s a basic caramel panna cotta. So likewise, the filling can be served by itself as a panna cotta. Together, their forces combine to be a wonderful portable dessert.


They are best made the day of serving, as the base can go a bit soggy (still yummy though!). But remember that the caramel will need about 2-4 hours in the fridge to set. So the base doesn’t soak up too much of the caramel, ensure the biscuit base is cool. And sprinkle the fine sea salt on just before serving, so it doesn’t dissolve and you still get the delightful flakey texture. Then try not to eat all of them before your guests come!

Macadamia Salted Caramel Tarts


Macadamia Salted Caramel Tarts

Macadamia Pretzel Base

1 cup macadamias
1 cup pretzels (loaded fairly full)
2 tbsp raw sugar
2 tbsp butter
1 egg


Preheat oven to 175C


Pulse the macadamias, pretzels and sugar in a food processor until fairly fine, but some chunks still remain for texture. Pulse through the butter until well mixed. Then add the egg and process until it comes together into a dough.


Spray mini muffin tins with cooking spray, then press a heaped teaspoon or so into the tin, creating the pie base. As you add the caramel as a liquid, it needs to be a solid base without gaps.


Bake for 10-15 minutes or until golden. Check around the 7 minute mark. If they have puffed up a lot, gently press back down and finish baking. Remove from the oven and leave to cool in the tin.


Macadamia Salted Caramel Tarts


Caramel Filling

330mL cream
85g caster sugar
5 grams leaf gelatin
Fine sea salt flakes


Soak the gelatin leaves in a shallow bowl of cold water.


Place the caster sugar into a large pot over a medium-high heat. Stir gently with a wooden spoon to encourage the sugar to melt. It will become a clear liquid, then leave over the heat and stop stirring until it goes a caramelly golden colour, but watch carefully to make sure it doesn’t burn. 

When it’s golden and it smells caramelly and delicious, carefully pour the cream in. It will spit a bit, so be careful. This will make the caramel turn hard and crunchy. Stir the cream constantly to dissolve the caramel. When all of the caramel is melted back into the cream, gently squeeze the excess water from the gelatin leaves and dissolve them one by one into the cream. Stir for a further minute then strain through a fine sieve into a jug.


Set aside to cool for 5-10 minutes, then carefully fill each tart base as high as you dare. Slide the tray into the fridge to set.

Just before serving, sprinkle a few salt flakes on each tart

P.S. The Beaufort Street Festival is on November 15th where you can buy the Recipes and Ramblings Cookbook!


Macadamia Salted Caramel Tarts
Macadamia Salted Caramel TartsMacadamia Salted Caramel Tarts
Macadamia Salted Caramel Tarts

Tuesday, September 30, 2014

Get Well Soon - Herbed Cream Cheese and Prawn Pizza


Get Well Soon - Herbed Cream Cheese and Prawn Pizza


Lance and I both got hit by the flu that was going around. It knocked us around quite a bit and in an attempt to kick it, I started amping up the health-promoting ingredients in all of our dishes. This on top of the lemon, honey and ginger teas we were drinking like they were going out of fashion. One Sunday we were both feeling sorry for ourselves, the sun was shining and I was a bit over the soups. So I made these cold-kicking cream cheese pizzas – full of garlic, ginger, chilli, fresh herbs and lemon and honey squeezed over the top. We sat out in the sun to get some vitamin D and shake off some of the germs and cobwebs from being in bed for a week. 

It felt a lot like the sitting at the pub and having a gourmet pizza that we were missing out on, and it perked us up enough to get back to work the next day.


You don’t need to be sick to enjoy these. But they’re easy enough to cook when you are. I think this is going to make a few appearances over Spring and Summer. Possibly with real, homemade pizza bases!


Get Well Soon - Herbed Cream Cheese and Prawn Pizza


Herbed Cream Cheese and Prawn Pizza


100g peeled raw prawns
4 lebanese loaves
250g Philadelphia cream cheese
2 bunches coriander
1 bunch parsley
2 cloves garlic, peeled
1 tsp red chilli, minced
1 tsp grated ginger
¼ tsp salt
Handful bean sprouts
1 tbsp capers
Handful rocket
Lemon wedges for serving


Preheat the oven to 170C


Throw your cream cheese, coriander, parsley, garlic cloves, chilli, salt and ginger in a food processor. Pulse until it’s all chopped up and evenly combined.


Spread over the Lebanese loaves, then distribute the prawns, capers and bean sprouts. Pop in the oven and cook for 20 minutes until the prawns are pink and the cheese is getting golden at the edges.


Serve with a handful of rocket on top, then drizzle over some honey and add lemon wedges.
Even better with a beer or crisp white wine


Get Well Soon - Herbed Cream Cheese and Prawn Pizza

Tuesday, September 2, 2014

Friend Inspiration - White Chocolate Mojito Fondue

Friend Inspiration - White Chocolate Mojito Fondue - Cape Naturaliste Winery
 Friend Inspiration - White Chocolate Mojito Fondue - Cape Naturaliste Winery
Friend Inspiration - White Chocolate Mojito Fondue - Cape Naturaliste Winery


Despite being told on more than one occasion that I talk too much, I often find myself lost for words. If there’s something I’m passionate about, and have limited scope to get out all of that passion, I end up not knowing where to start or what to say at all. So I just don’t. It’s with a little bit of embarrassment that I finally do this post. I took this photoswith Jen to post over a year ago, but I wasn’t sure exactly where to go with the story, so I just didn’t do anything with them.


My whole life, most of my family holidays have been to the South West region of WA. Just a few short hours’ drive south of the city, the air changes, the scenery changes and you just automatically start to relax. Even knowing I’m going ‘down south’ soon makes me feel calmer. As I have grown, my appreciation of the area has too. And nothing more so than the food and wine. There are so many amazing local produce-driven restaurants in the area now. And, of course, there’s the wine. I’ve grown from being a nothing-but-sweet-whites drinker to a heavy reds drinker and everything in between through my south-west education. And the Margaret River wine region provides them all. I’ve lost count of how many wineries I’ve visited down south, but my absolute favourite of all time is 
Cape Naturaliste Vineyard. The wines here are absolutely phenomenal. And then there’s the owner and frequent cellar door host, Jen.


Friend Inspiration - White Chocolate Mojito Fondue - Cape Naturaliste Winery

I first met Jen when I was on honeymoon. Lance proposed to me in the most epic and romantic way possible on Molloy Island, so when it came time to choose our honeymoon destination, it was pretty obvious that we should spend it there as well. We spent just over a month chilling out down south, and it was on a limousine wine tour that we were introduced to Cape Naturaliste Vineyard. We just clicked with Jen the instant we met her, she’s so warm and open. We chatted about everything under the sun and the topic of food came up, as it often does with me. She’s quite the foodie herself (her winery is even hosting a Gourmet Escape Event!) and she told me about her go-to dinner party dessert - White Chocolate Mojito Cheesecakes. Something easy and decadent all at once. She even left us at the cellar door and ran up to her house to find the cookbook the recipe was in and brought it back down to photocopy for me. So it makes sense for this post to go back to where it all began.

You can find the recipe for the original cheesecake recipe on the taste.com.au website. Here, I’ve simplified it even more and made the texture runnier so that it is no longer a cheesecake, but a delicious sweet dip. As with most fondues, you can change the dipping items to suit what you have at home. I always like to use some form of ginger biscuit, because it goes really well and as a nod to the original cheesecake base. Lightly salted tortilla chips work well, as does most fruit sturdy enough to dip. Unlike most fondues, this one is actually served cold. And so is perfect for entertaining as the weather becomes decidedly more Spring! I like to serve it alongside a normal cheese platter and with a glass of white.


Check out Cape Naturaliste next time you're in the Margaret River Region, I promise you won't be disappointed!


Friend Inspiration - White Chocolate Mojito Fondue - Cape Naturaliste Winery

White Chocolate Mojito Fondue

1/2 cup sugar
1/4 cup water
1 cup packed mint leaves
zest and juice of 4 limes
1/4 cup Bacardi (or other white rum)
100g white chocolate
500g Philadelphia Cream Cheese (2 blocks)

to serve
strawberries
gingerbread
apple or pear slices

In a small pot, stir together the sugar and water over a low heat until the sugar has dissolved. Leave for 5-10 minutes until the mixture becomes syrupy. Add the mint leaves, lime zest, lime juice and rum. Stir well, then set aside to cool to room temperature. Pass the mixture through a fine sieve, pressing down with a spoon to get all of the minty limey goodness out.

Chop the white chocolate roughly and place in a glass bowl. Microwave in 30 second bursts until melted, stirring between each go. You'll probably only need to do it twice. Set aside to cool for around 5 minutes.

In a food processor, pulse the cream cheese to break up. Then blend for 30 seconds until smooth and soft. Add the white chocolate and blend to combine. Lastly, blend in the minty lime syrup. Mix on a high speed for 2 minutes or until completely smooth and combined. 


Pour into the serving bowl and refrigerate for 2 hours to chill and set slightly.

Serve with fresh fruit slices and gingerbread biscuits for dipping!


Friend Inspiration - White Chocolate Mojito Fondue - Cape Naturaliste Winery
 Friend Inspiration - White Chocolate Mojito Fondue - Cape Naturaliste Winery
Friend Inspiration - White Chocolate Mojito Fondue - Cape Naturaliste Winery

 
*Disclaimer - whilst I might be biased because I love Jen, her wines have won a bunch of awards